Step 1. Flatten and Duplicate Art Layer
If your design contains multiple layers, flatten it by navigating to the Layers panel.
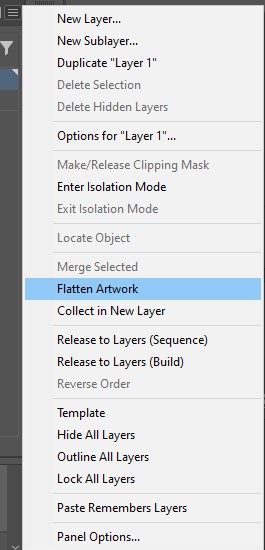
- Click the drop-down menu in the top right corner and select "Flatten Artwork."
Then, name the layer "Art."
(If your design is already on one layer, ignore the above flattening step.)
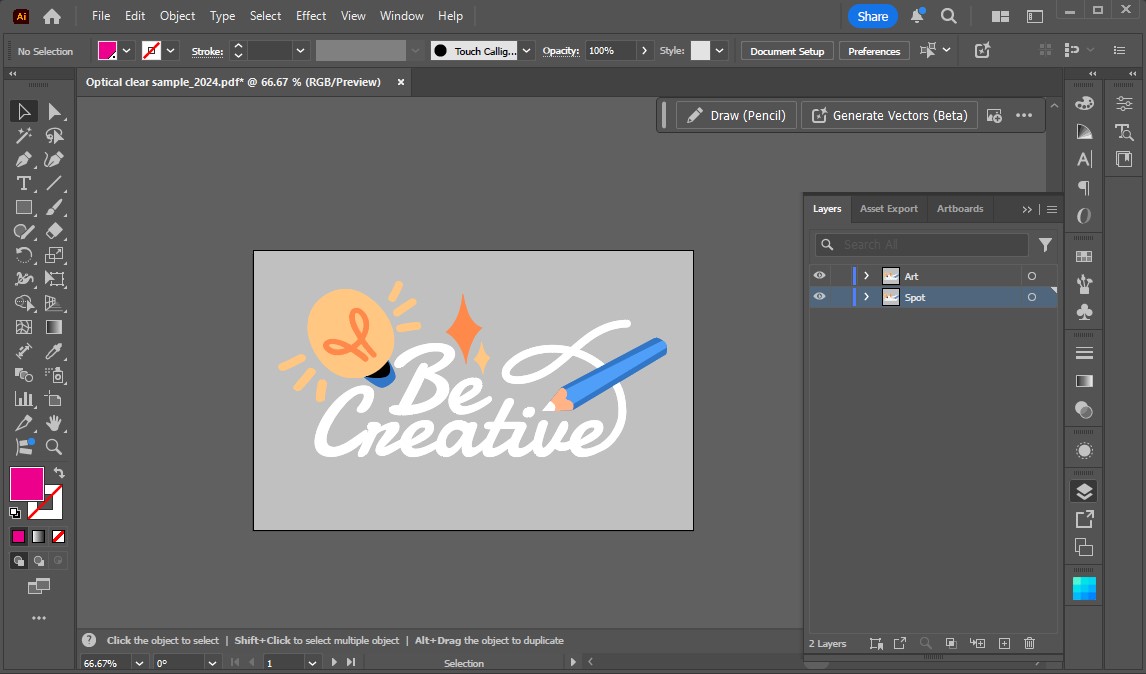
Next, duplicate your art layer by selecting "Duplicate Art" from the same drop-down menu in the Layers Panel. Rename the duplicated layer to "Spot."
You should now have two layers in your Layers Panel: Art and Spot
Step 2. Create a Spot Swatch
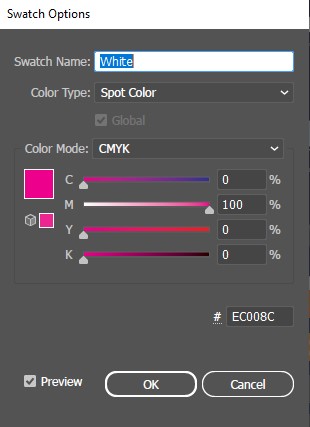
Next, create a spot swatch color by going to the Swatch Panel. Click the drop-down hamburger button in the top right corner and select “Create New Swatch.”
In the New Swatch window that appears, first rename the new color to "White." Next, click the color type drop-down menu and select "Spot Color." Then, choose any color to represent your white ink and click OK.
Tip: We like using 100% Magenta, but go ahead and get creative with your color mix. It won’t print that way, we promise.
Step 3. Apply the Spot Color to Your Art
Now that you've created a spot swatch, apply it to your duplicated layer, which you've named "Spot"
Tip: Since you’ve already duplicated your art layer, you can lock it and turn off the preview before continuing, just to avoid possibly making these adjustments on the wrong layer. Leave your spot layer unlocked with the visibility on.

Step 4. Save the Files as PDFs
Once all white ink areas look appropriately represented, save your file as PDFs.